Wednesday, December 26, 2012

Effective inflammed acne cure

This remedy is a surprised find, as the purpose of this skin care remedy is supposed to reduce pores and remove blackheads.

The wonderful side effect, is reducing the volcano-like, inflamed acnes!!!

After the wonderful find, I did some Google research, and some people have indeed testified its effectiveness :D

The wonderful home remedy for inflamed pimples:

The ingredients that work wonders!


  • Baking soda (gram/chickpea flour will do, but I think baking soda has a more microdermabrasion effect)
  • Fresh orange juice

You just need one thin slice of orange

Add baking soda, until you can feel the sand-like texture in the orange juice. It's NOT going to be a thick paste.

You may need a clean brush to apply this on your face. I pour the mixture on my palm, and place directly on my face, focusing the concentrated baking soda and orange juice on the inflamed pimples.
Leave the mixture on for about 15 minutes, or until you can't stand the stingy sensation (for people with sensitive skin perhaps, I don't have the issue, except feeling the tingling sensation on the pimples LOL).

On the first use, the big-red-about-to-explode pimple on my forehead was flattened!!! Though you can still see the red patch but that is all!
I had this mega monstrous pimple on my lower chin, the size was significantly reduced!

For people with sensitive skin, it might give you a red face after the treatment. I don't have that except on the acne areas.
Here are some other remedies that I've tried and effective as well, particularly cinnamon with honey, tomato juice, organic oatfour with honey or yogurt, and ground cloves with yogurt.

Tuesday, December 25, 2012

Chick pea flour home remedy for face

I initially bought chick pea flour for experimenting new food recipe as I explore making vegan meals (chick pea flour is a substitute for eggs, other than flaxseed gel). However when I come across its use as beauty mask/cleanser/exfoliator, I can't wait to try it out.

I bought this from Giant supermarket in Malaysia, though I wish to buy one from Indian grocery (for the sake of authenticity), but I guess I can just try the supermarket product. It cost RM2 for 500g, pretty cheap!

So this is a popular Indian home remedy for beauty care, that works for skin whitening, reducing pore size, and overall improving face skin, sworn by Bollywood actresses.

I don't want the skin whitening effect because I don't want to look pale, but I have these freaking freckles resulting from driving to work and back, though I always have sunblock applied on my face :(
And also, the pore-size reducing effect is what I always wanted but any products that I used claiming to do the work never give me any improvements but my pores keep on enlarging over the years as I age T_T

So this is the recipe that I use, adapted from Indian Girl:

Ingredients from top to bottom: organic honey, low fat natural yogurt with ive and active cultures, and chickpea flour.
For whole face:
  • 1 tablespoon of chickpea flour (I added more to reach the thickness that I want, so in the end it's 2 tbs I think)
  • 1 teaspoon of milk or honey if prefer a thicker consistency
  • 1 tablespoon of natural unsweetened yoghurt
After some experiments, you will eventually know how much you need for your whole face or only targeted problem areas. The picture above and below are the amount for cheeks and lower chin areas only.

After mixing everything together.

It's very important to use unsweetened products on your face because refined sugar/manufactured sweetener is the culprit to acne/pimples :(

I apply the mask on my face after cleanse my face with my favourite face wash, and then proceed to make meal and wash cloths (I love multitasking!). I don't know how long I left it on, may be about 15 minutes, and I only intend to wash it off when the mask starts to dry up. You can feel the tingling sensation and I don't want the drying up process creating wrinkles on my face. So I wet my hands and gently scrub around my nose, forehead, cheeks, and lower chin (acne prone/large pore areas) and then rinse them off.

The verdict? OMFG it's been years I have a minimal pore-looking face! The brightening effect and the pore-minimizing effect actually reveal my face with more freckles that I didn't notice... but the minimized pore does feel great! So now I know where to target the freckles... oh brown spots please stop multiplying LOL.


Chick pea flour is my new love now 

Monday, August 20, 2012

Make up remover

I bought wet wipes from Guardian pharmacy in Klang Valley Malaysia as make up remover, and they did a good job in removing foundation, powder, concealer, and eye make up.


These three actually smell the same despite different packaging colors (LOL). Each color comes in 3, which means I got 9 packs in total, for about RM11 when it was on sale. Pretty cheap I would say. Each pack contains 10 wipes, so these last me for more than 3 months, since I don't put on make up everyday.

The face would become extremely dry after wipe (for me), so I usually dot on some light moisturizer after each wipe, if I don't go to bath immediately after removing my make up.

I have to use oil-remover to remove mascara so I don't lose my precious lashes by rubbing too hard. As of now, the sage-coconut oil remedy for eye-lashes conditioner is doing good so far. I can see one of my lower eye lashes is outgrowing the other lashes (LOL), so I gotta make sure I have even application so they grow equally long. Will post a before-and-after verdict after some time.

I am looking for good natural make-up remover, I've tried coconut oil, but the result is not perfect and my face became a greased baking sheet after the make up was removed.


Sunday, August 12, 2012

Sage leaves and coconut oil: eyelashes conditioner

This home remedy is adapted from Kirby Koo's. I have sparse eyelashes, and my lower lashes are almost non-existence T_T

The ingredients call for olive oil, but I don't think I like the smell of it on my eyes, so I substitute it with my favorite coconut oil, which I found some other people use instead of olive oil. In addition, it has the 'darkening' effect on hair (I don't mind having my lashes grow more, longer and darker) ;)

Ingredients:


- 1 tsp extra virgin coconut oil
- about 7 or 8  fresh sage leaves
- a small bowl
- some boiling hot water (just enough to submerge the leaves)
- a small clean bottle
- cotton bud


I prefer fresh herb over dried ones. Well, another reason is I can't seem to find any fried sage leaves here :p

The lovely herb with a lovely look 

I chose a 'branch' of sage  J

Adding the boiling hot water. I added a bit more because I plan to have some  to be mixed with honey to drink. I have sore throat at the moment and the sage is said to be curing sore throat as well.
Let this sit for an hour for it to be cooled.

This is the result of 4 teaspoons of sage water plus a teaspoon of coconut oil. The coconut oil  can be seen as the top layer here.

Shake well before use. This is after shaking. I use cotton bud to dip and apply on  my upper and lower lash lines. You can use a clean mascara wand instead.
As suggested by Kirby Koo, make these in small batches so we use the freshest possible tonic on our eye areas.

Most remedies calls for 1 part of oil and 1 part of sage water. But I'm afraid that too much oil will clog pores or irritate the eyes. So I decided to reduce the amount of oil to sage water ratio.

For people living in Klang Valley of Malaysia, you can find fresh herbs especially sage leaves from Cold Storage. I got mine from Sunway Pyramid's Cold Storage, I suppose the one in Subang Summit have this too. I tried looking for sage leaves (dried or fresh) in Carrefour, Jusco, Tesco, and Giant with no luck.

Also, the sage leaves can be eaten! We can fry it stove top or bake it in an oven and then eat them as chips!

Saturday, August 11, 2012

New home remedy love

It's been ages I abandon this blog, and finally I manage to guess the password right (phew).

I discontinue the green tea-apple cider vinegar toner because my partner dislike the smell on my face, and the smooching on the face turned awful (LOL).

And I finally wanna give this remedy that sounds horror a try... Extra Virgin Coconut Oil! And oh it has been  wonder product, and I say this after only a few days of use!

This is the one that I am using:

From Cosway
Cost about RM25 (roughly $8)

And I didn't realise the organic shop that I entered belongs to Cosway... smart strategy to use different name for a direct selling store (because I am most certainly will avoid walking into a direct selling store).

How to use coconut oil on your face:

After washing your face and patting it dry, use your favorite toner, and then dip one or two of your finger(s) into the coconut oil bottle, and then quickly and carefully (the oil is a very runny liquid) rub between 3 fingers of both of your hands, and then massage your face.

I focus on my T-zone, area around my nose and my chin, the most acne-prone areas.

Verdict:

After 3 days, I am surprised with another beneficial side-effect: my acne scars are fading!! I did a quick check on google and found out that people do actually have their scars faded after using coconut oil, what a welcoming surprise! My main purpose of using it is to properly moisturise my face and reduce the occurrence of acne. So this is like a triple-effect solution which is just perfect. Also, it reduce wrinkles :)

I just found out about my beauty faux-pax while visiting beauty salon for face spa: I shouldn't use cream-like moisturiser  And I had been using those for years! No wonder no matter what I use my face still looks out of control. So after I give up on my Hada Labo lotion which is white in colour and cream-like, I switched to gel-type moisturiser and my face is thanking me. But the gel-type moisturiser is whacking a big hole on my wallet---they are freaking expensive!!! This is the reason why I turned to google for help with great home remedy for moisturising face without breaking out, and that's how I fell for the new-found love of coconut oil :)


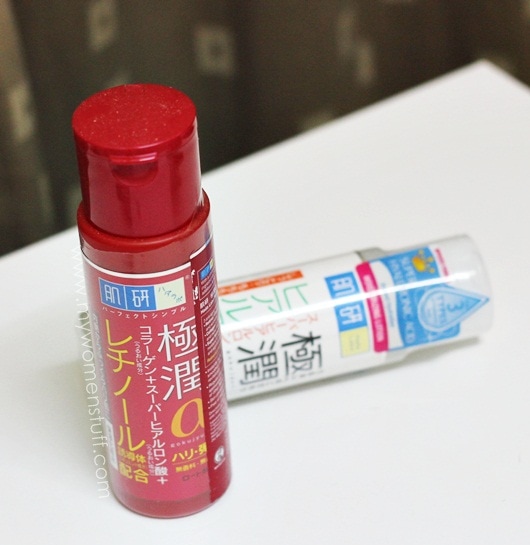
Hada Labo Retinol Lifting and Firming Lotion (Red), and its best-seller moisturising lotion (white). 
Source: MyWonmenStuff (I'm too lazy to take picture and put them up, orz)


The red bottle is the one that I currently use as toner. I have to give up the most-raved moisturiser in Japan (the white bottle) because it actually doesn't suit my skin type :(

I will still keep looking for a all-natural toner option. Because you know, our skin 'eats' 80% of whatever we put on it. So I hope my skin eat organic food too <3 p="p">